Looking for a safe and simple tick removal process with the use of appropriate tools? We’ve got you covered! Don’t panic the next time you see a tick on your dog because this blog will guide you through the step-by-step tick removal process.
Before understanding the correct and safe way of removing a tick, let’s first unfold other relevant things that make the process more effective, ranging from the importance of tick removal to spotting the places where ticks can be found on your dog.
Let’s get started!
Importance of safe tick removal
Ticks are blood sucking parasites that not only cause pain and discomfort but also transmit harmful diseases, including Lyme disease, Babesiosis, Ehrlichiosis, Rocky Mountain Spotted Fever, etc. After getting attached to the dog’s body, ticks can transmit diseases within 24-48 hours. Hence, spotting and removing them as early as possible is paramount.
But while removing ticks, it is crucial to be very careful and remove the tick properly from the tick’s head and not the body, as the head can remain attached to the dog’s skin, leading to infections in the future.
Uncovering ticks – Places where ticks can be found on your dog
Ticks can hide in various places on a dog’s body and spotting them beforehand facilitates easy and quick removal. Let’s have a look at the most common places where ticks tend to hide on dogs:
- Around and inside the ears
- Between the toes
- Underneath the tail
- On the eyelids
- Beneath the collar
- Under the arms
- Around the neck & collar
Effective tools for easy tick removal
Here are a few tools that help remove ticks easily and effectively:
- Disposable/Rubber gloves
- Tick removal tool or Tweezers
- Isopropyl alcohol
- A jar or a sealed container
- Disinfectant or Antiseptic cream
- Treats and toys
How to remove a tick from a dog safely?
Mentioned below are some simple steps to remove a tick safely from your dog:
- Wear protective gloves: Wear disposable or latex gloves, as it offers a strong grip and also helps create a protective barrier between you and the tick.
- Rub a disinfectant: Rub a disinfectant before removing the tick as it can irritate the tick, making it lose its grip and facilitating easy removal. Make sure you use a pet-friendly disinfectant and avoid using it near sensitive areas like the eyes, ears or nose.
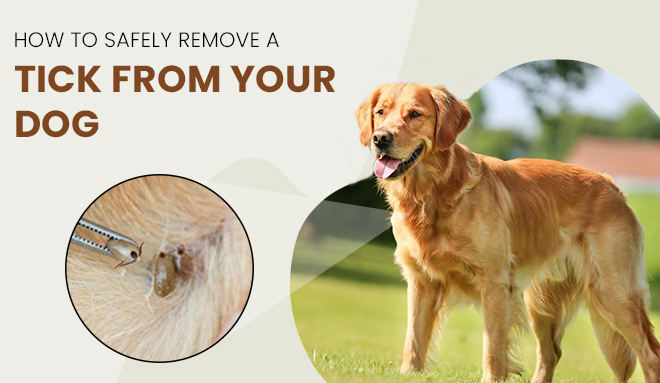
- Use a tick removal tool: Use a tweezer or a tick removal tool as it ensures easy and safe removal. Hold the tick firmly from its head and pull it in an upward direction without twisting. Check and make sure the tick is removed; especially the head, to prevent the risk of further infections.
- Clean dog’s skin properly: After the safe removal of tick, thoroughly cleanse the dog’s affected area with alcohol or a pet-safe disinfectant and apply an antiseptic cream. Also, properly wash your hands with soap and water after completing the process.
- Store the tick in a jar: Do not kill or throw the tick away and store it in a sealed jar for your vet’s reference. You might need it for identification purpose just in case your dog catches a tick-borne disease and shows relevant signs.
Aftercare – Things to keep in mind post tick removal
Once you have removed the tick successfully, do not forget to follow the steps mentioned below to keep your canine companion in good trim.
Watch out for symptoms
Keep an eye on your dog’s symptoms and if you notice anything unusual, such as fever, lethargy, inflammation near the tick bite, skin rashes, etc., consult the vet immediately to detect the root cause and prevent any potential disease.
Prevent future infestations
After removing the tick, it is essential to keep your dog protected from future infestations with tick preventives. Also, vaccinate your dog against various tick-borne diseases.
Wash the tools thoroughly
Post successful removal of the tick; wash the tools used in the process with isopropyl alcohol or a disinfectant to prevent the risk of future infections.
Final Thoughts
Although tick removal seems challenging; with the right knowledge and approach, it can be simple and easy. Make sure you keep checking for pet for ticks, use appropriate tools for tick removal and monitor your canine post removal. Do not forget to consult the vet regularly for early diagnosis and treatment of tick-borne diseases, if any and keep your pooch hale and hearty in the coming years.
Frequently Asked Questions (FAQs)
Q1. What are the signs of tick infestation in dogs?
Ans. Post tick infestation, dogs exhibit various signs such as excessive scratching or licking, lethargy, fever, weakness, red or inflamed skin, appetite loss, anemia, scabs or lumps around the bite area, etc.
Q2. Where do ticks lay eggs?
Ans. Ticks lay eggs in your pet’s environment and not on the dog. They need a moist and shaded area to lay eggs, such as under the carpets, in the grass, under the leaf litter, behind baseboards, etc.
Q3. For how long does a tick remain attached to a dog’s skin?
Ans. Ticks remain attached to a dog’s skin for five days to two weeks. They can sometimes stay attached for over three weeks before finding a new host or detaching themselves to lay eggs. However, ticks need to remain attached for 24-36 hours to transmit diseases.
Q4. What is the safest way to remove a tick?
Ans. The most effective and safest way to remove a tick from a dog’s body is through tweezers or a tick removal tool by holding the tick from its head and pulling it in an upward direction. Pro tip: rub a disinfectant to irritate the tick and make it loose its grip.
Q5. How to know if a tick is fully removed from a dog’s body?
Ans. To ensure that the tick is fully removed, check your dog for any remaining parts of ticks, such as the head, legs, etc. on their skin or between the fur. Look at the tick’s moving legs to have a clear idea whether it is completely removed or not.